--
:
--
:
--
通用二进制格式安装mysql-5-7-29
最后更新于:
2、实战:通用二进制格式安装 MySQL(mysql-5.7.29)-2024.4.6(测试成功)

目录
[toc]
实验环境
1mysql-5.7.29
2centos7.6 1810
软件位置:
链接:https://pan.baidu.com/s/1Q0y9RW4dFgEnmK5Vc3SKUg?pwd=q2sj
提取码:q2sj
2024.4.6-实战:通用二进制格式安装 MySQL(mysql-5.7.29)-2024.4.6(测试成功)

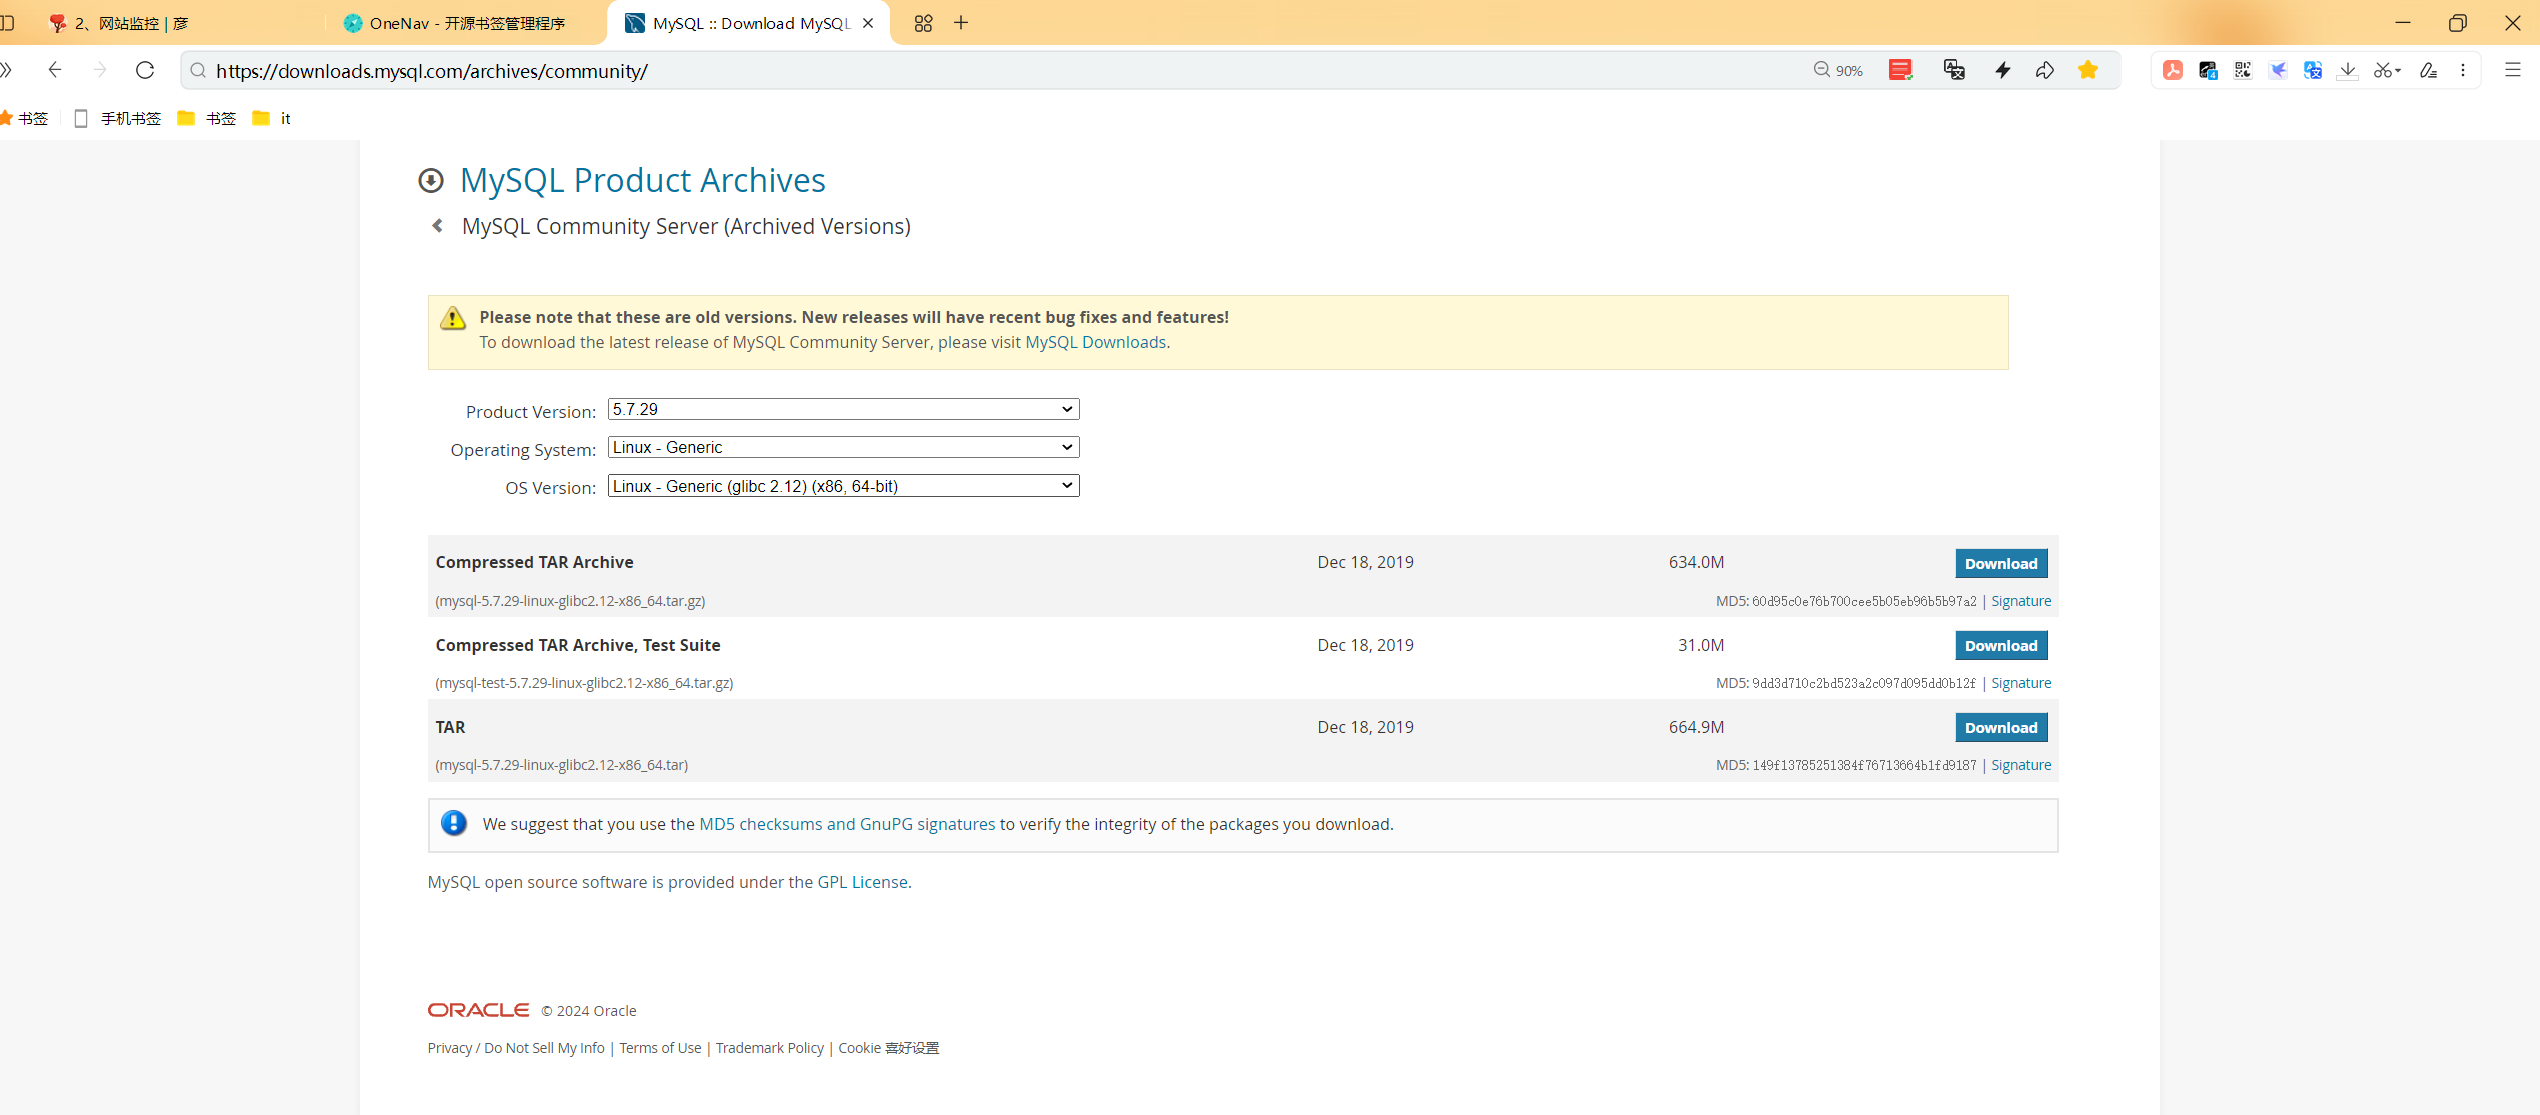
下载url
https://downloads.mysql.com/archives/get/p/23/file/mysql-5.7.29-linux-glibc2.12-x86_64.tar.gz
安装相关包
1yum -y install libaio numactl-libs
准备用户
1useradd -r -s /bin/false mysql
准备二进制程序
1tar xf mysql-5.7.29-linux-glibc2.12-x86_64.tar.gz -C /usr/local
2cd /usr/local/
3ln -s mysql-5.7.29-linux-glibc2.12-x86_64/ mysql
4chown -R root.root /usr/local/mysql/
准备环境变量
1echo 'PATH=/usr/local/mysql/bin:$PATH' > /etc/profile.d/mysql.sh
2. /etc/profile.d/mysql.sh
准备配置文件
 1cp /etc/my.cnf{,.bak}
 2
 3vim /etc/my.cnf
 4[mysqld]
 5datadir=/data/mysql
 6skip_name_resolve=1
 7socket=/data/mysql/mysql.sock
 8log-error=/data/mysql/mysql.log
 9pid-file=/data/mysql/mysql.pid
10[client]
11socket=/data/mysql/mysql.sock
生成数据库文件,并提取root密码
 1mkdir -p /data/mysql
 2chown mysql:mysql /data/mysql
 3mysqld --initialize --user=mysql --datadir=/data/mysql
 4
 5...省略...
 62019-07-04T13:03:54.258140Z 1 [Note] A temporary password is generated for
 7root@localhost: LufavlMka6,!  #注意生成root的初始密码
 8
 9grep password /data/mysql/mysql.log
102019-12-26T13:31:30.458826Z 1 [Note] A temporary password is generated for
11root@localhost: LufavlMka6,!
12
13awk '/temporary password/{print $NF}' /data/mysql/mysql.log
14LufavlMka6,!
⚠️ 注意:
我这里实际测试时需要手动创建
/data/mysql目录的,但老师当时测试时不需要直接创建的。
准备服务脚本和启动
1cp /usr/local/mysql/support-files/mysql.server /etc/init.d/mysqld
2chkconfig --add mysqld
3service mysqld start
修改口令
1mysqladmin -uroot -p'LufavlMka6,!' password magedu
另外,自己这里测试时是需要到mysql里去修改密码的,使用mysqladmin是无法正常修改密码的;
自己这里测试时报错了:
 1[root@vm-template ~]#awk '/temporary password/{print $NF}' /data/mysql/mysql.log
 2?Ny,T;oKg5t>
 3[root@vm-template ~]#
 4
 5mysqladmin -uroot -p'?Ny,T;oKg5t>'   password magedu
 6
 7[root@vm-template ~]#mysqladmin -uroot -p'?Ny,T;oKg5t>'   password magedu
 8mysqladmin: [Warning] Using a password on the command line interface can be insecure.
 9mysqladmin: connect to server at 'localhost' failed
10error: 'Your password has expired. To log in you must change it using a client that supports expired passwords.'
11[root@vm-template ~]#
📌 gpt
1[root@vm-template ~]#mysqladmin -uroot -p'?Ny,T;oKg5t>'   password magedu
2mysqladmin: [Warning] Using a password on the command line interface can be insecure.
3mysqladmin: connect to server at 'localhost' failed
4error: 'Your password has expired. To log in you must change it using a client that supports expired passwords.'
当MySQL用户的密码过期时,您将无法用常规方法或常规客户端更改密码,因为它们可能不支持密码过期功能。在这种情况下,您需要使用支持密码过期的客户端来重置密码。对于MySQL,通常意味着您需要直接连接到MySQL服务器并通过命令行进行操作。
请按照以下步骤操作:
使用支持密码过期的MySQL客户端登录。打开终端,并尝试:
1mysql -uroot -p系统会提示您输入密码,这时输入您的旧密码
?Ny,T;oKg5t>。如果MySQL版本支持,登录后您可能会被提示修改密码。如果是,请按提示操作。
如果没有自动提示,或者提示不起作用,您可以在MySQL提示符下运行以下命令来设置新密码:
1SET PASSWORD = PASSWORD('您的新密码');或者,若MySQL版本为5.7.6或更新,应使用以下命令:
1ALTER USER 'root'@'localhost' IDENTIFIED BY '您的新密码';
2
3ALTER USER 'root'@'localhost' IDENTIFIED BY 'xyy520';
请确保将
'您的新密码'替换为您想要的新密码。执行完上述命令后,退出MySQL:
1quit现在您应该可以使用新密码通过mysqladmin或其他客户端工具连接到MySQL了。
如果您在这个过程中遇到任何问题,请再次检查您的MySQL服务器的版本和配置,因为不同版本可能需要略有不同的操作。
📌 再次测试(测试OK,符合预期)
 1[root@vm-template ~]#mysql -uroot -p
 2Enter password:
 3Welcome to the MySQL monitor.  Commands end with ; or \g.
 4Your MySQL connection id is 20
 5Server version: 5.7.29
 6
 7Copyright (c) 2000, 2020, Oracle and/or its affiliates. All rights reserved.
 8
 9Oracle is a registered trademark of Oracle Corporation and/or its
10affiliates. Other names may be trademarks of their respective
11owners.
12
13Type 'help;' or '\h' for help. Type '\c' to clear the current input statement.
14
15mysql> ALTER USER 'root'@'localhost' IDENTIFIED BY 'xyy520';
16Query OK, 0 rows affected (0.00 sec)
17
18mysql> \q
19Bye
20[root@vm-template ~]#mysql -uroot -pxyy520
21mysql: [Warning] Using a password on the command line interface can be insecure.
22Welcome to the MySQL monitor.  Commands end with ; or \g.
23Your MySQL connection id is 21
24Server version: 5.7.29 MySQL Community Server (GPL)
25
26Copyright (c) 2000, 2020, Oracle and/or its affiliates. All rights reserved.
27
28Oracle is a registered trademark of Oracle Corporation and/or its
29affiliates. Other names may be trademarks of their respective
30owners.
31
32Type 'help;' or '\h' for help. Type '\c' to clear the current input statement.
33
34mysql> show databases;
35+--------------------+
36| Database           |
37+--------------------+
38| information_schema |
39| mysql              |
40| performance_schema |
41| sys                |
42+--------------------+
434 rows in set (0.00 sec)
44
45mysql> \q
46Bye
47[root@vm-template ~]#
测试登录
 1[root@vm-template ~]#mysql -uroot -pxyy520
 2mysql: [Warning] Using a password on the command line interface can be insecure.
 3Welcome to the MySQL monitor.  Commands end with ; or \g.
 4Your MySQL connection id is 21
 5Server version: 5.7.29 MySQL Community Server (GPL)
 6
 7Copyright (c) 2000, 2020, Oracle and/or its affiliates. All rights reserved.
 8
 9Oracle is a registered trademark of Oracle Corporation and/or its
10affiliates. Other names may be trademarks of their respective
11owners.
12
13Type 'help;' or '\h' for help. Type '\c' to clear the current input statement.
14
15mysql> show databases;
16+--------------------+
17| Database           |
18+--------------------+
19| information_schema |
20| mysql              |
21| performance_schema |
22| sys                |
23+--------------------+
244 rows in set (0.00 sec)
25
26mysql> \q
27Bye
28[root@vm-template ~]#
安全初始化(可选)
 1#/usr/local/mysql/bin/mysql_secure_installation
 2
 3Enter current password for root (enter for none): #默认没密码,这里直接回车
 4
 5
 6You already have your root account protected, so you can safely answer 'n'.
 7Switch to unix_socket authentication [Y/n] #输入n(远程可以登录)
 8
 9#mysql.sock 使用unix socket登录(只能在本地登录,不能远程登录);
10/var/lib/mysql/mysql.sock文件
11
12Change the root password? [Y/n] #输入y
13New password: #输入密码:xyy520
14Re-enter new password:
15
16Remove anonymous users? [Y/n] #输入y
17
18Disallow root login remotely? [Y/n] #输入y,禁用root远程登录
19
20Remove test database and access to it? [Y/n] #输入y
21
22Reload privilege tables now? [Y/n] #输入y(是否加载权限)
shell一键安装
见如下位置:
次脚本测试成功,可一键部署的。
https://onedayxyy.cn/docs/mysql-install-bindary-shell-2
关于我
我的博客主旨:
- 排版美观,语言精炼;
- 文档即手册,步骤明细,拒绝埋坑,提供源码;
- 本人实战文档都是亲测成功的,各位小伙伴在实际操作过程中如有什么疑问,可随时联系本人帮您解决问题,让我们一起进步!
🍀 微信二维码
x2675263825 (舍得), qq:2675263825。

🍀 微信公众号
《云原生架构师实战》

🍀 个人博客站点

🍀 语雀
https://www.yuque.com/xyy-onlyone
🍀 csdn
https://blog.csdn.net/weixin_39246554?spm=1010.2135.3001.5421

🍀 知乎
https://www.zhihu.com/people/foryouone

最后
好了,关于本次就到这里了,感谢大家阅读,最后祝大家生活快乐,每天都过的有意义哦,我们下期见!
📡
推荐使用微信支付

推荐使用支付宝